
This will be a three part series. In the first part, I’ll start with a bit of history to explain why drivetrains were 3x so long and show the most simple conversion. You might just skip history and head for the section on preparing the 1x conversion.
Parts of the series will be:
- History and the most simple conversion (this)
- Converting 7 and even 6 speed hubs to 8 to 10 speed
- Choices for budget drive trains when shifter and derailleur might be replaced
- Chosing a 1980s to early 2000s bike for conversion
The years between 1986 and 2000 probably was a time that showed a monopoly is the single worst thing stiffling innovation. Shimano just dominated bicycle drivetrains and tried to expand this monopoly to brakes by offering extremely integrated solutions (without any practical benefit) still in the early 2000s. Companies like SRAM and later Microshift managed to get a foot in the business by offering drop-in replacements: Compatible parts that could be swapped against Shimano parts.
There was no fundamental change in cassette spacing or general approach to drivetrains. It was considered as fact that ideal spacing between gears was 10-15%. And despite at lower gears at steep grades 25% were welcome, a 3x setup meant pedaling on the middle chainring the full cassette spacing needed the lower steps. Another limitation was parallelogram geometry: With Shimano hardware four teeth absolute steps were considered maximum.
So: Going back in time, in 1994 eight speed mountain was 11-13-15-18-21-14-28-32, a few years later 9 speed added a wide range 11-36 (or just narrow spacing 11-32) and another few years 10 speed with 11-40 (and narrow spacing 34). At this time Shimano already could have offered a 1×10 with 11-42 for commuting and leisure mountain biking without changing any major parts – by just increasing one jump from four to six teeth.
Well, as we all know, Shimano wanted to sell a few chainrings, front derailleurs and thumb shifters. So they even kept setups with multiple chainrings when introducing electronic shifting DI2 XT and XTR. Some dumb algorithm would decide for you when it is time to change the chainring. I just don’t get why this did not catch on…
To cut short, take the well appreciated 11-28 cassette with 7 speed from 1993, and add one or two speeds with 20-25% without caring for absolute steps. This gives us a 11…28-34 (eight speed) and an 11…28-34-40 or 11…28-34-42 (nine speed). Not bad. So actually a One-by setup with 11-36 does not offer significantly less range than a 28-48 (front) with 14-28 (rear) in 1988? Let us start from here and move on to practical decisions.
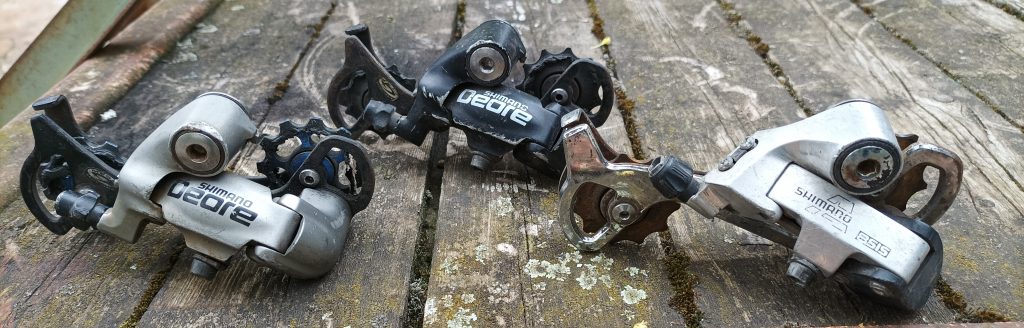
Check the derailleur
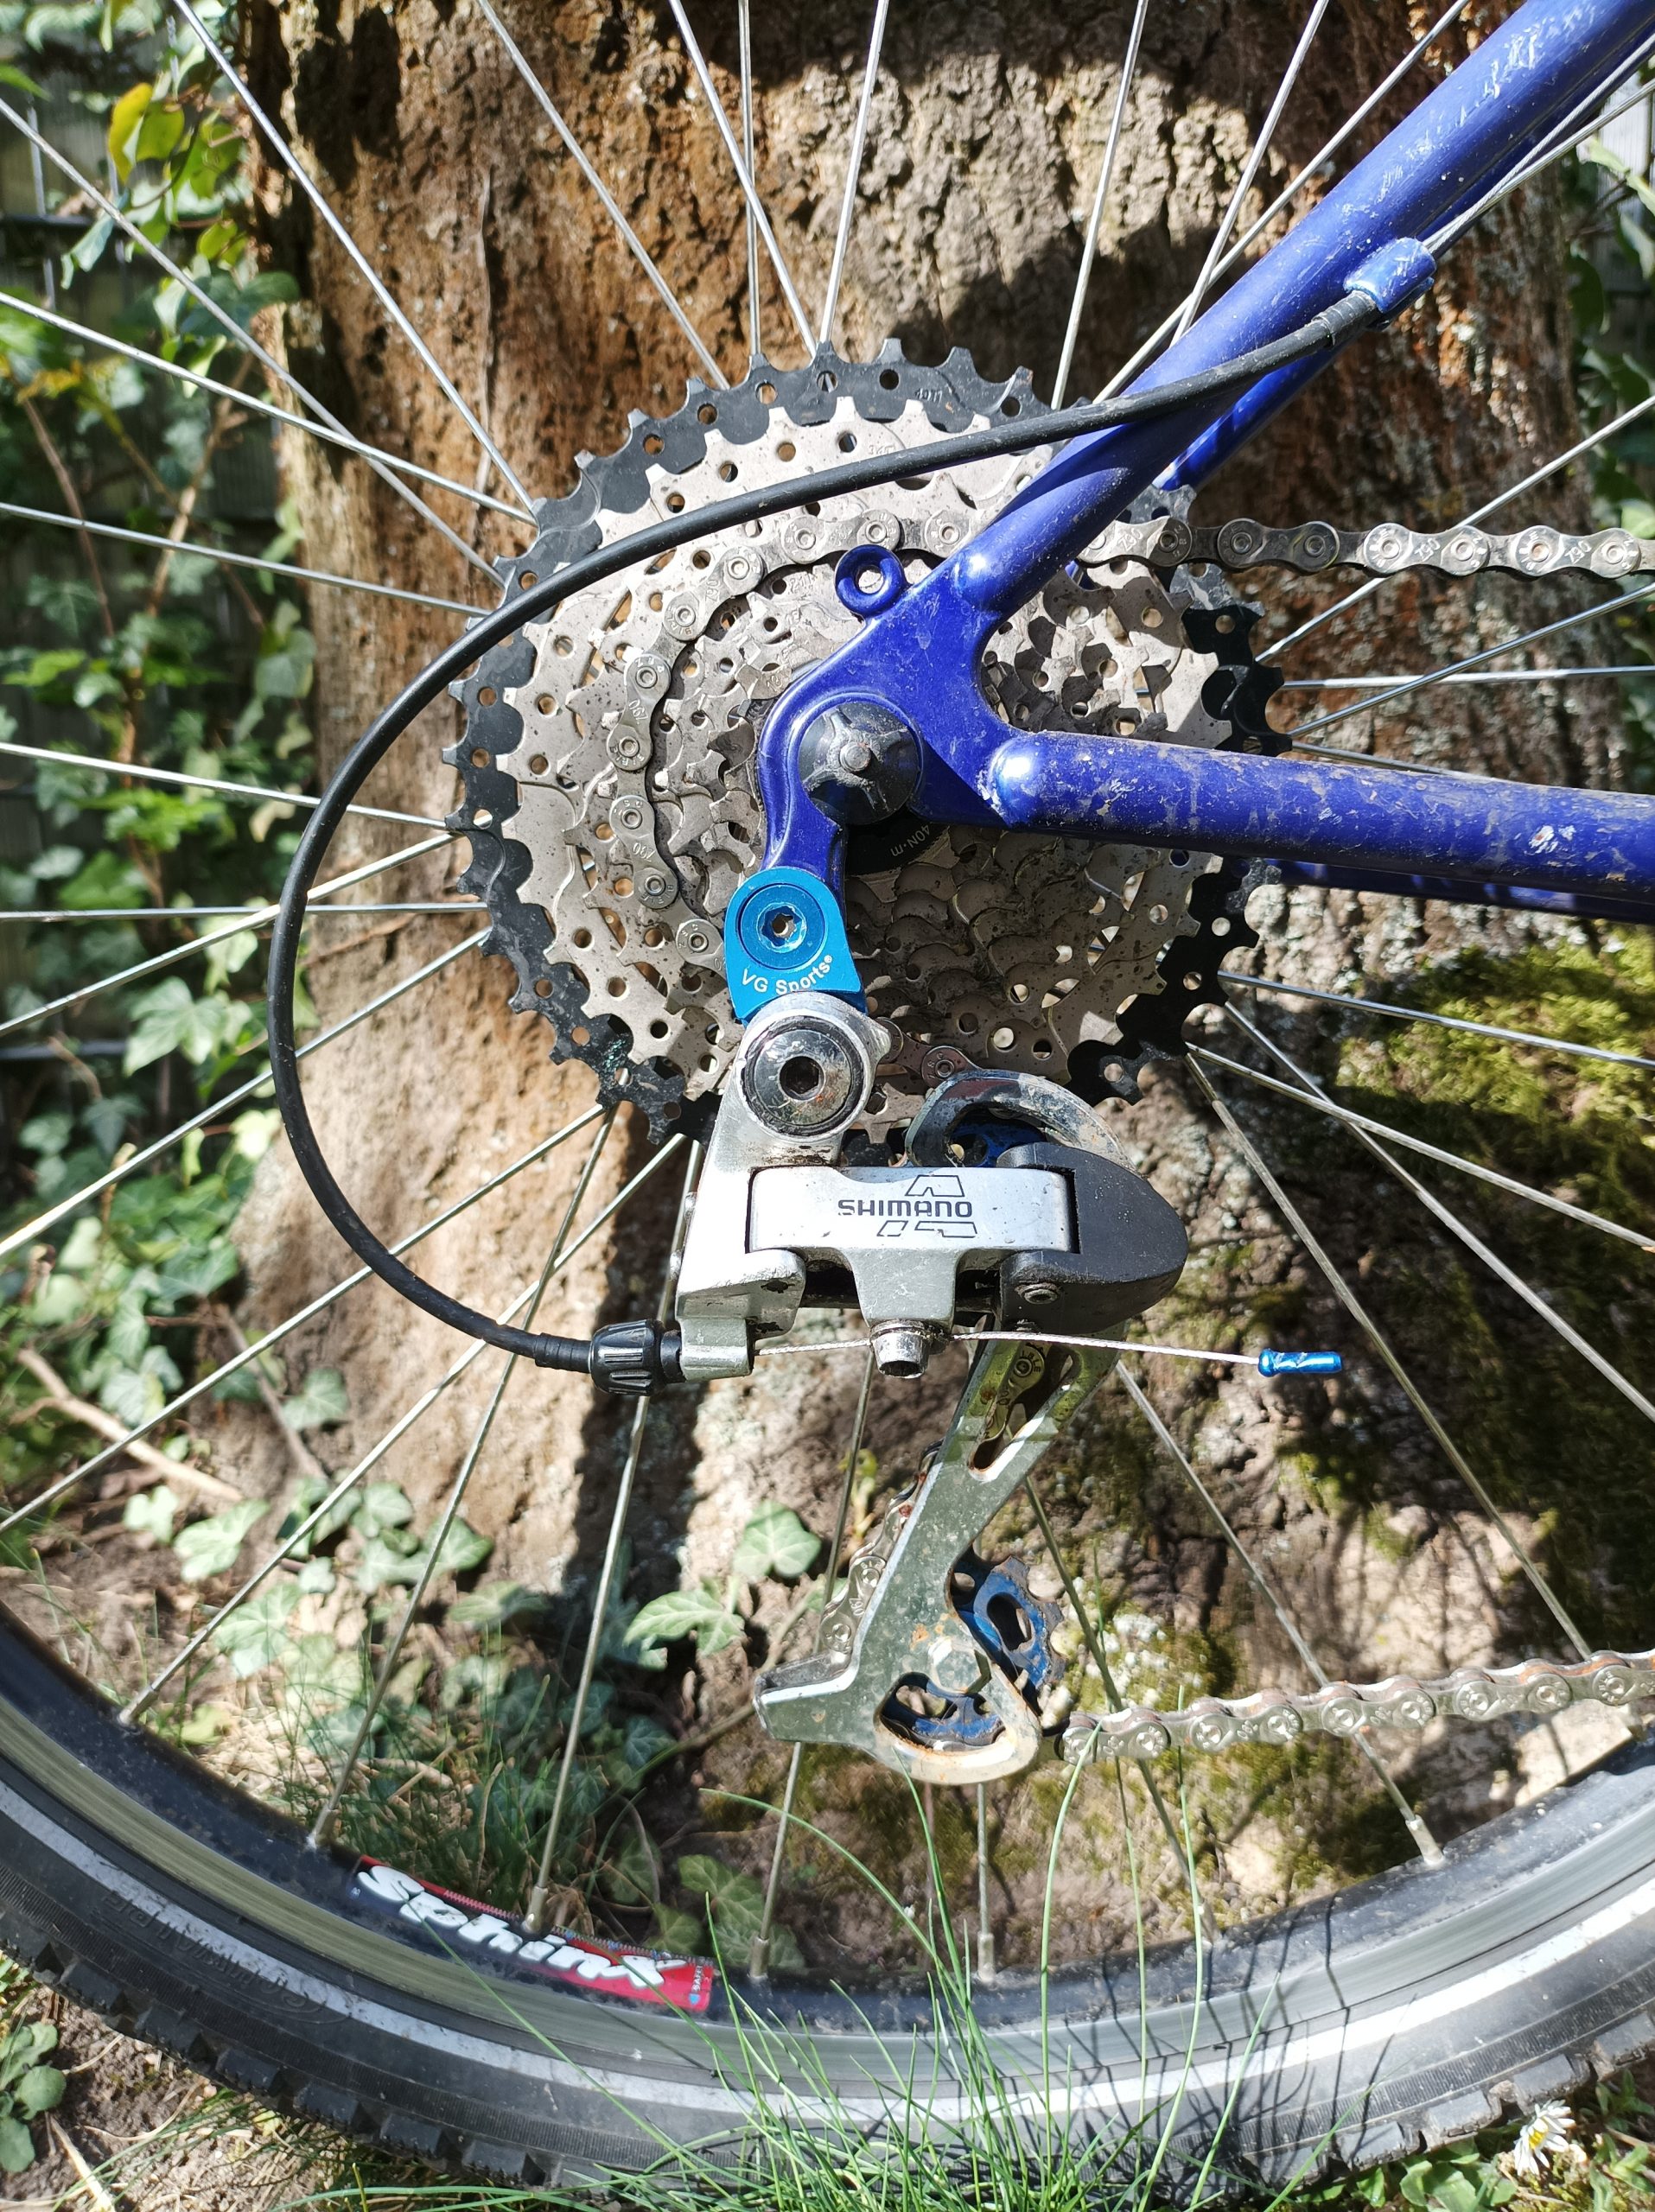
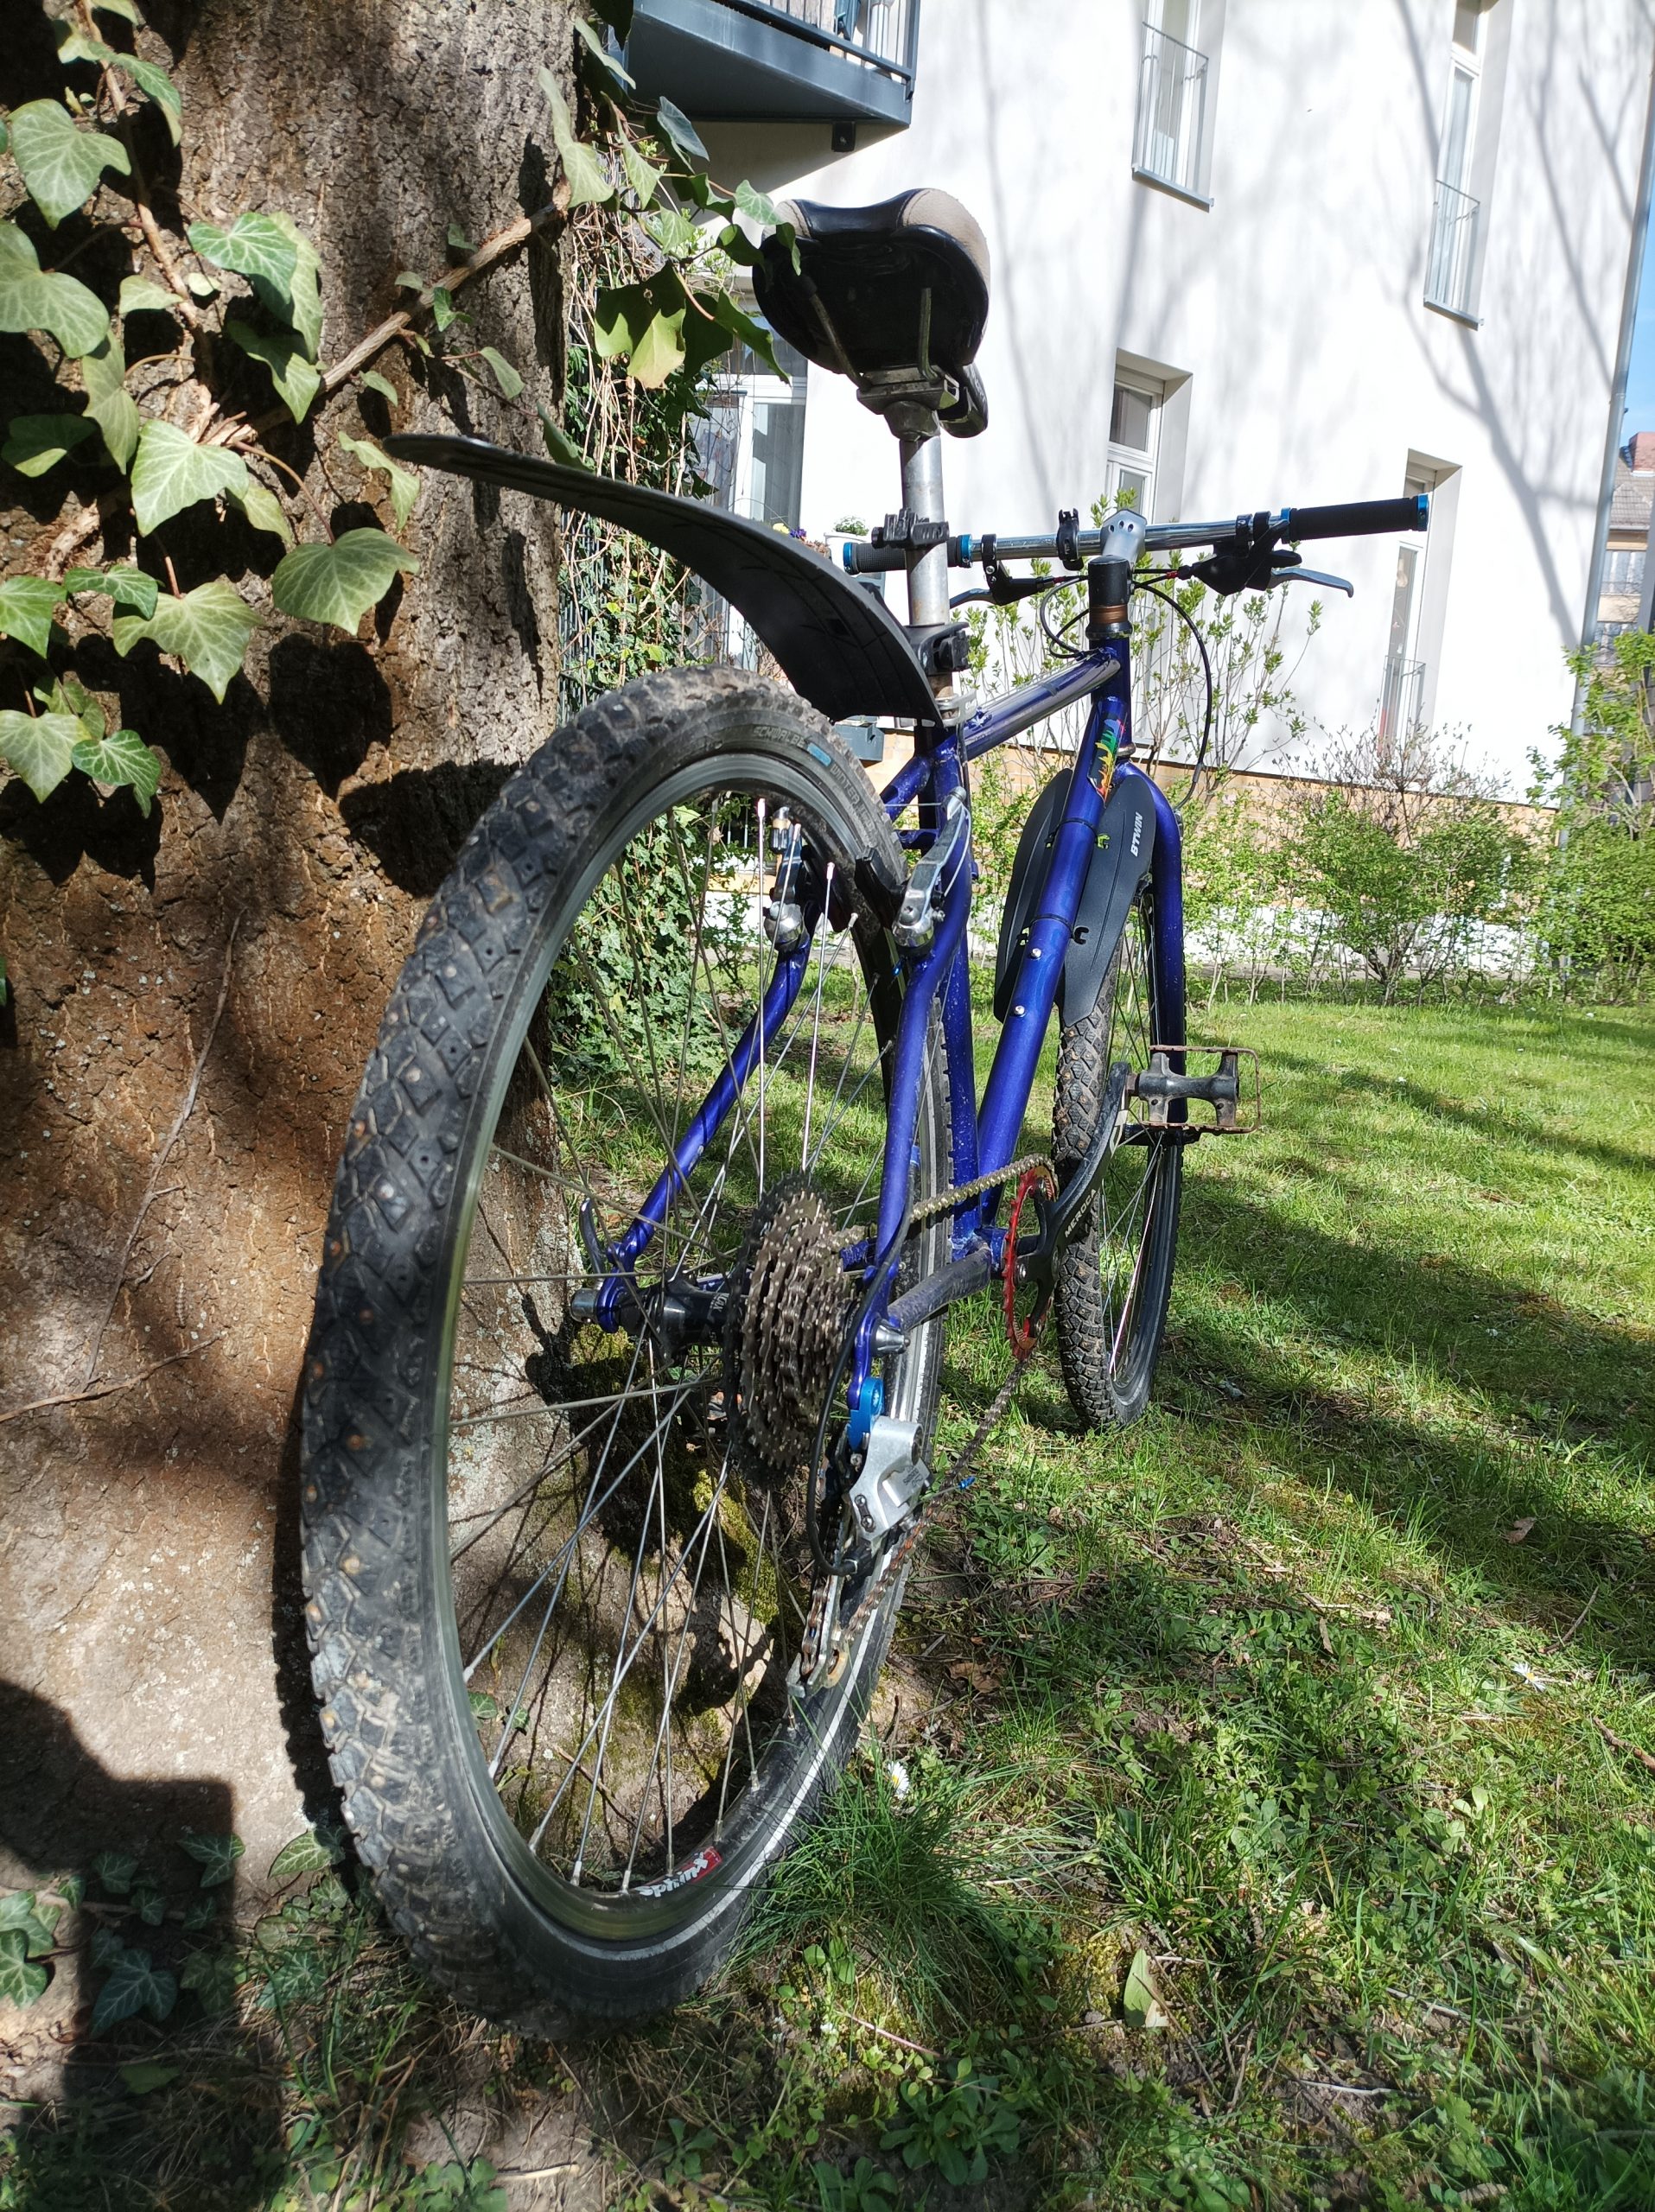
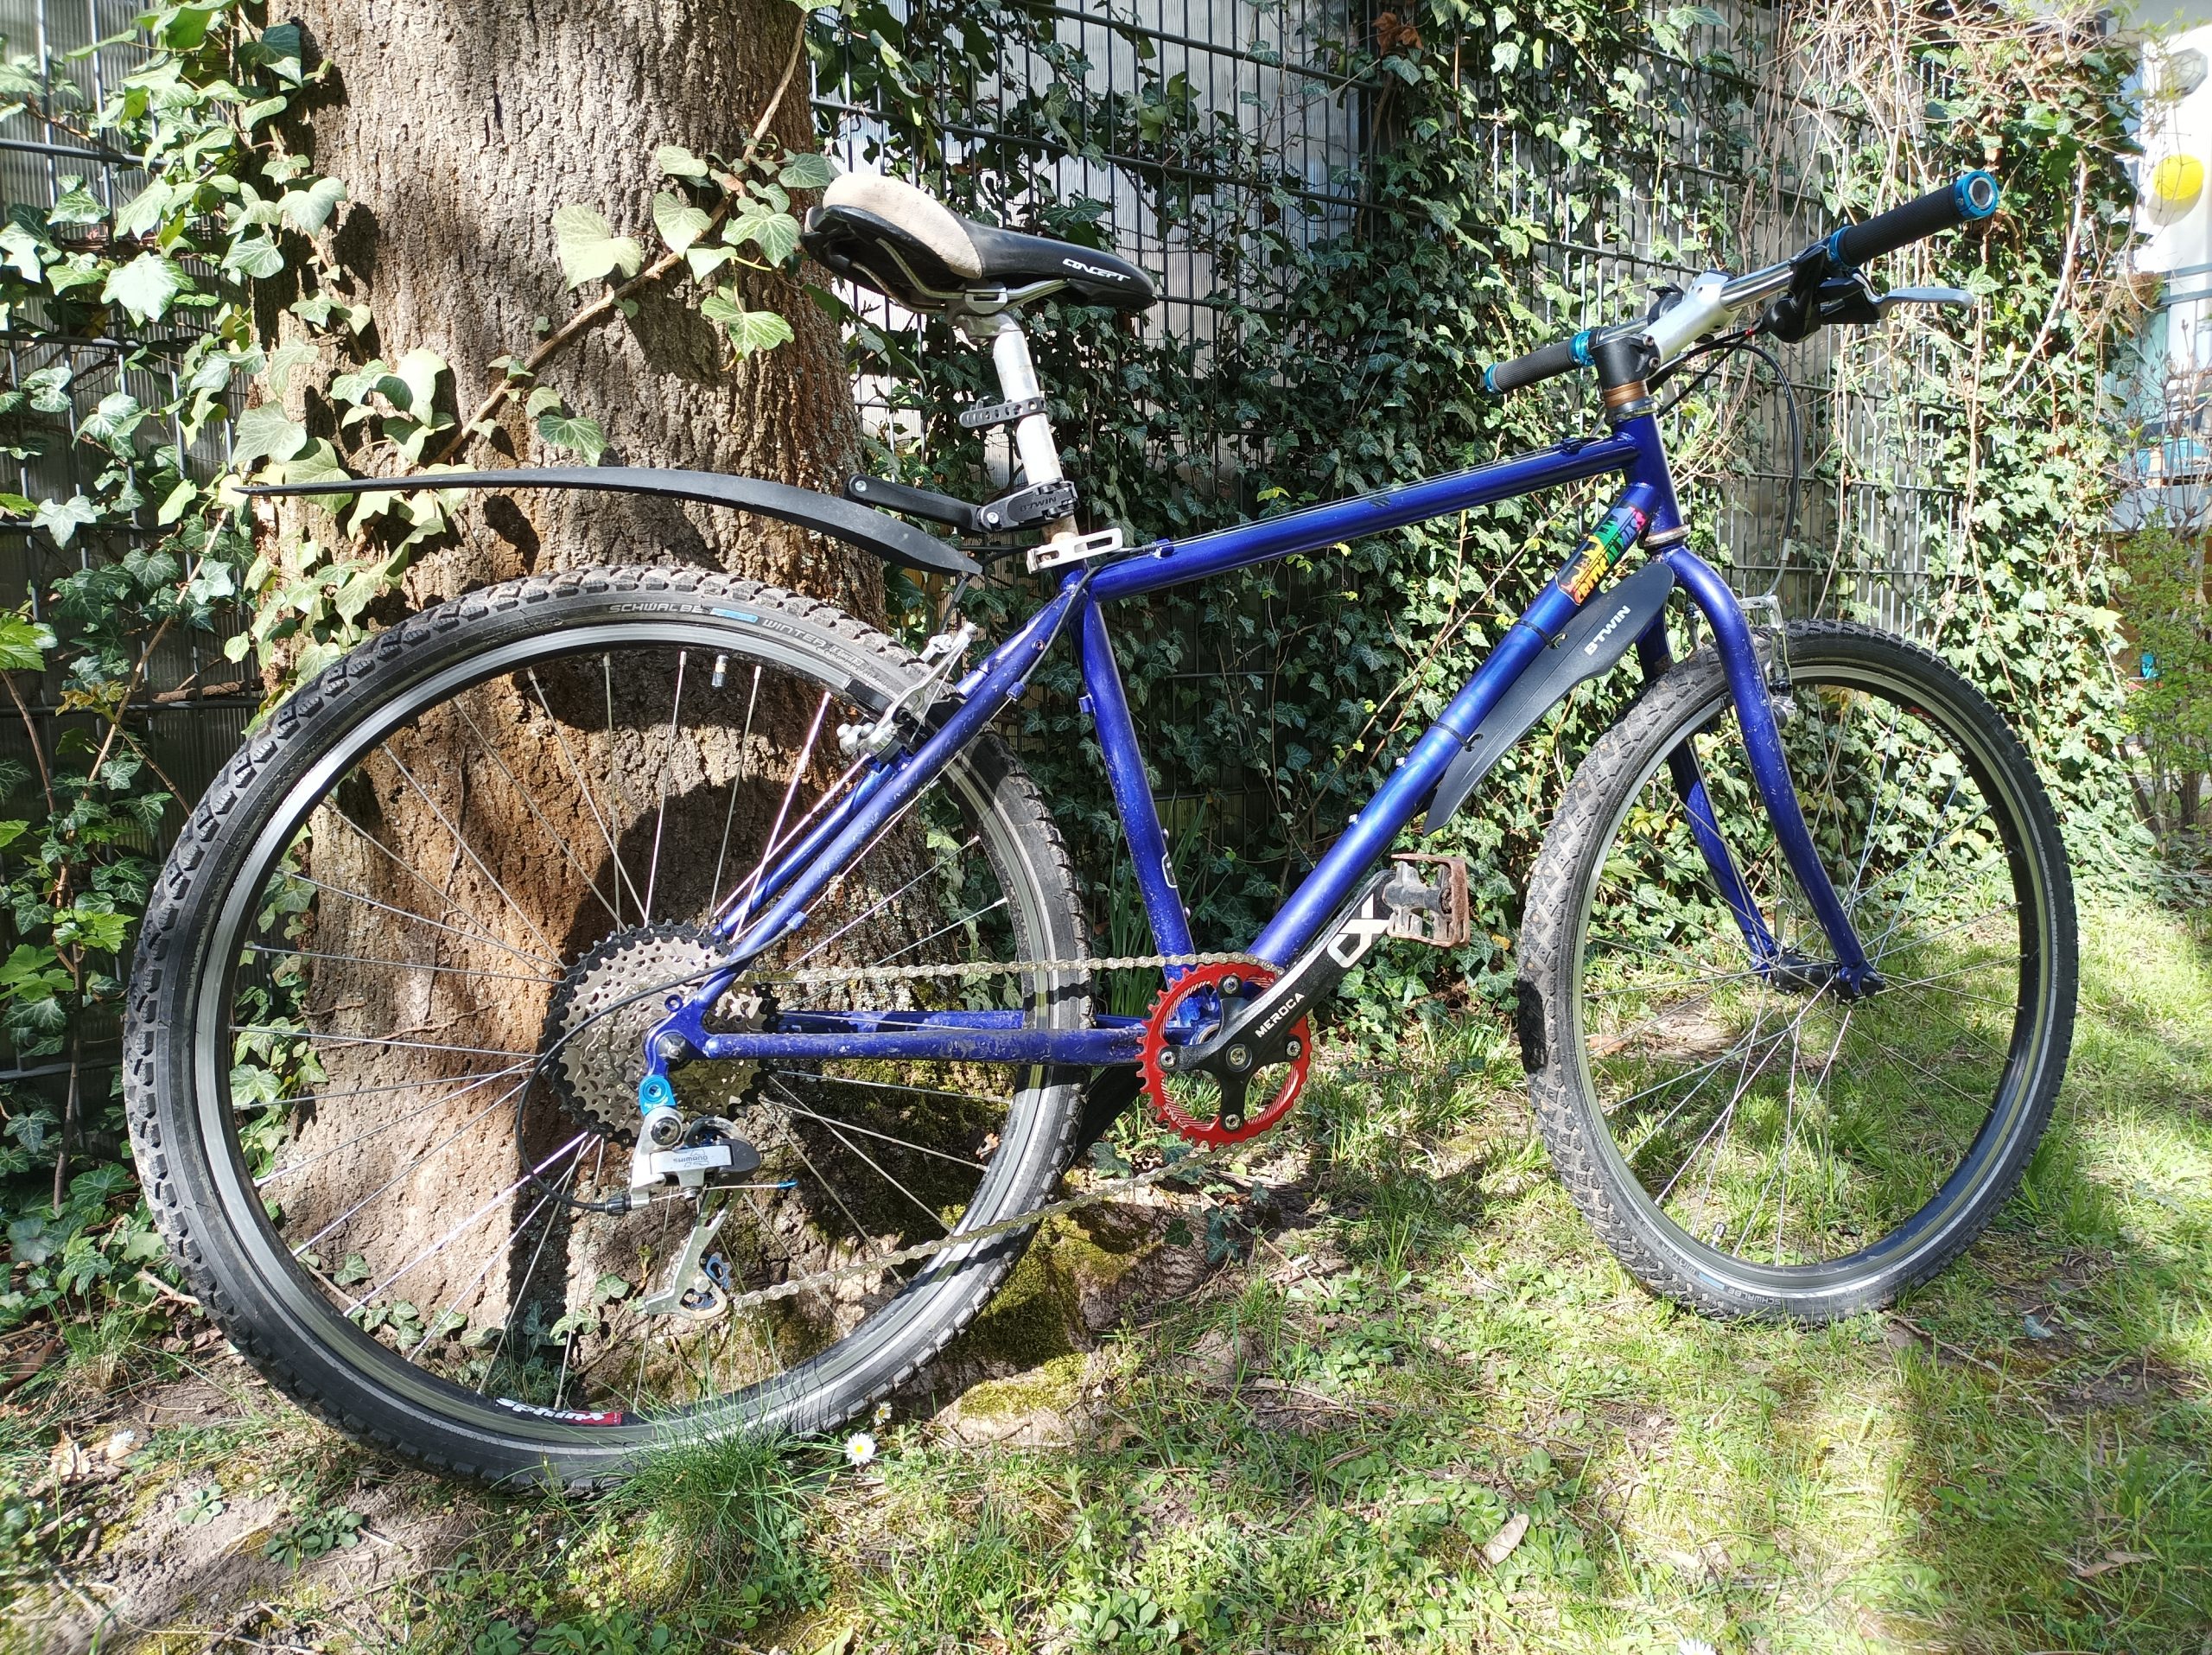
History aside, you have some Shimano equipped bike that was sold between 1986 and 2003? Check. It has a so called cassette hub, where all gears are on a single groove? Check. The rear derailleur has a slant parallelogram? Check. The parallelogram has 40mm+ distance at the pivoting points? Check. The cage has 75+mm between the two pulleys? Check.
Starting in the 1980s Shimano did some really comprehensive documentation on so called “total capacity” which is basically how to cope with morons that use the whole range 24 (front) 12 (rear) “small-small” up to 46-32 “large-large” gears – in this case (a typical 1993 XTR setup with 24-46 front and 12-32 rear) 42 teeth total capacity are necessary. Such a derailleur with 86mm or more distance between the pulleys works well with 42 teeth, a derailleur with 75-80mm should only be used up to 40 teeth.
Check the wheels (and modify them)
The current wheelset is six or seven speed? You have to replace the narrower cassette body by the 4mm wider eight speed version. This usually is an easy task, since starting in 1985 up to now Shimano hubs only used two types of freewheel bodies. If your hubs are XTR (you lucky one!), check whether they are of the first generation (that only fits 12 teeth minimum, you have to change the freewheel body here as well) or parallax (these allow 11 teeth minimum).
To change the freewheel body, you will either get a salvaged hub from a broken wheel (typically like 5€ at you local bike shop), buy a cheap FH-RM030 or FH-RM040 (15€) or just the freewheel body plus hollow bolt (15€ as well). I prefer getting a complete hub, since this usually allows replacing worn parts as well.
I’ll do a separate article with images on changing the freewheel bodies, also differentiating the two Shimano types available.


Going 8, 9 or even 10 speed?
The so called “8 speed freehub body” happily accepts 9 and 10 speed cassettes: For 9 speed the spacing was narrowed down and for 10 speed after further narrowing down the dish of the wheel was used to make a cassette that is actually about 2mm wider than the freewheel body. For a budget conversion I would try to keep as many parts as possible, so if 3×8 was the starting point, opt for a wide range 8 speed cassette. If 3×6 or 3×7 was the starting point or the shift lever is broken, you’ll need a shift lever anyway, go for 9 speed.
10 speed is a little different: When changing the mountain bike groups to 10 speed, Shimano opted for a different pull ratio (less tension on the cable, but more cable travel), but kept the road groups at the old pull ratio. So if you are able to get one of the rare Ultegra or 105 flat bar 10 speed shifters (or Tiagra 4600 or Microshift R10), you might go 10 speed with 11-42, but keep in mind that it will have to be adjusted more frequently. If you want to change derailleur and shift lever as a matching combination: I am also preparing a guide on cheap 1×10 solutions from Taiwan and China.
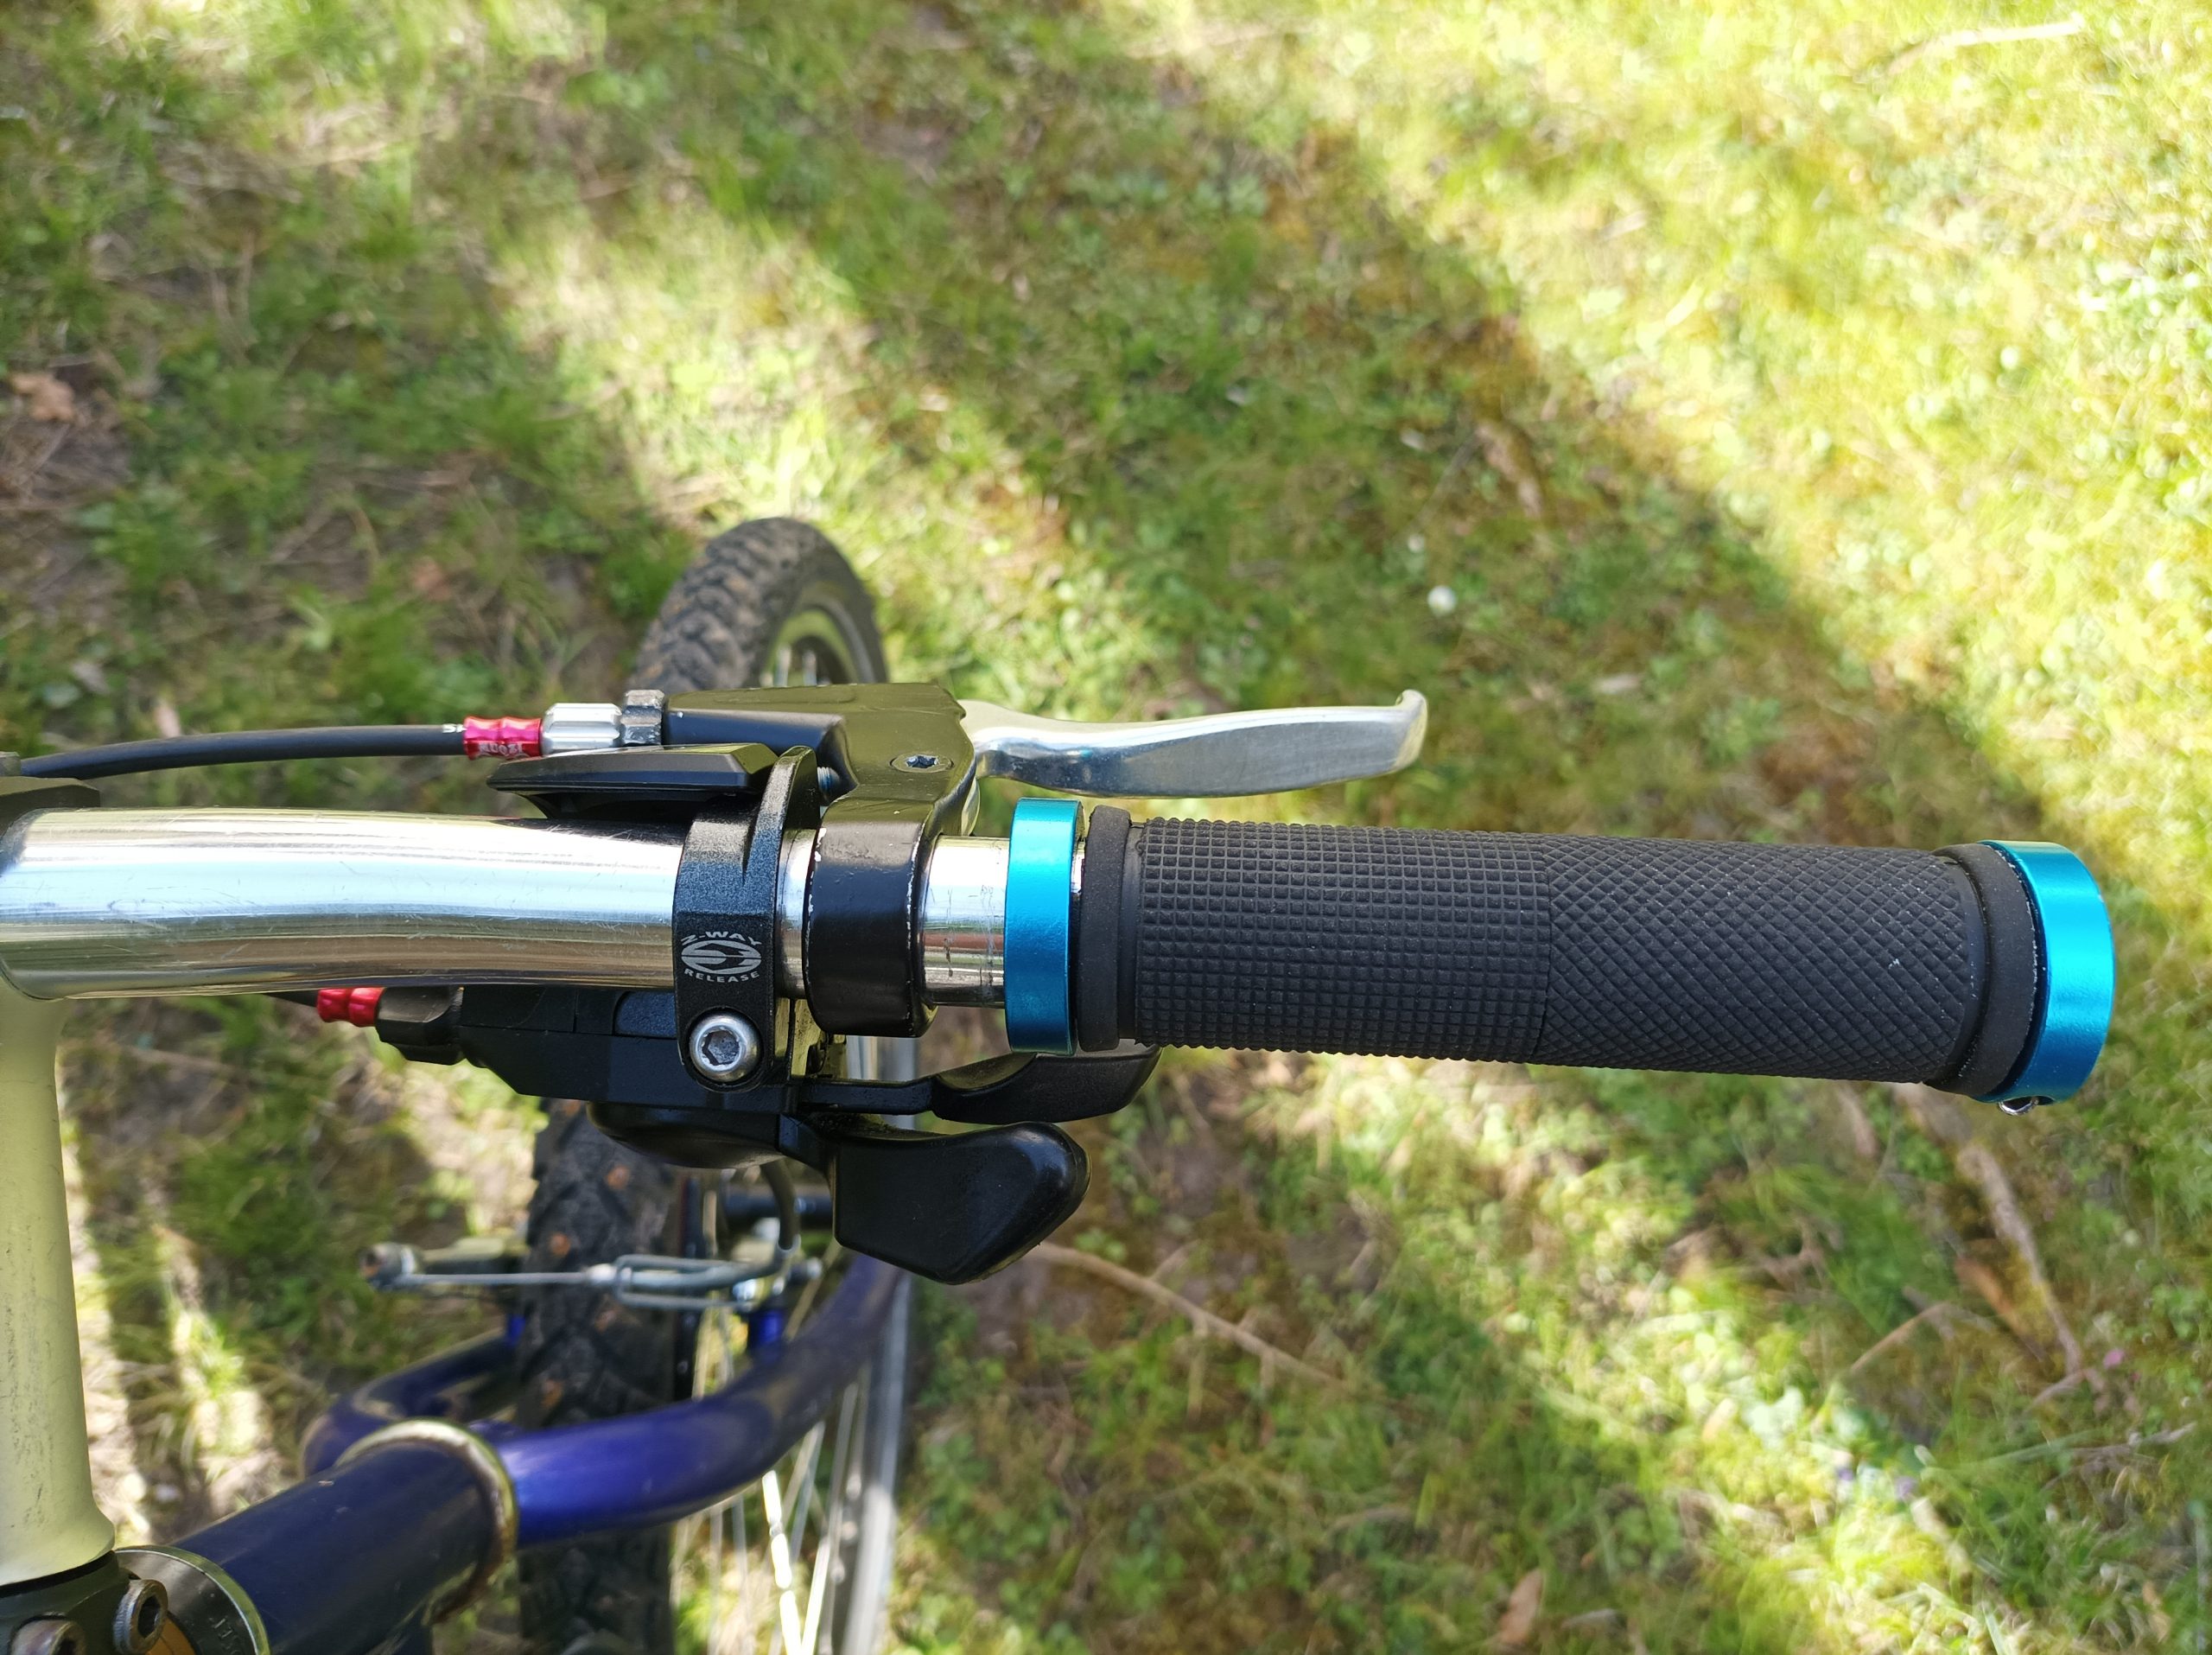
Shift lever options for 1×9 are plenty: You can use any used Shimano 9 speed shifter. Surprisingly often they are not worn, just clogged up with sticky grease. “Repairing” them is as easy as opening the case, flushing them with brake cleaner or acetone and lubricating them with PTFE spray. Or you buy a new shifter. Decathlon offers Microshift TS39 for 14€ a piece and there are thumb shifters from SunRace for around 30€. Aliexpress sells “Micronew” for 10€, the innards are basically MicroShift, but plastic is cheaper and the precision is worse. Additionally the clamp of the TS38 clone is bulkier, so just chose Micronew if the original part is not available. Of course any Acera/Alivio 9 speed will work as well. When buying new shifters “Made in China”, make sure they are the “2:1” or “Shimano compatible” version.
For kids I’d prefer either LTWOO A5 (push pull) or Deore/Tiagra/Alivio/Acera, all with indicator since they have lighter spring loads and differentiation between the fingers (thumb for a lighter gear and index finger for harder gear) is easier to explain.

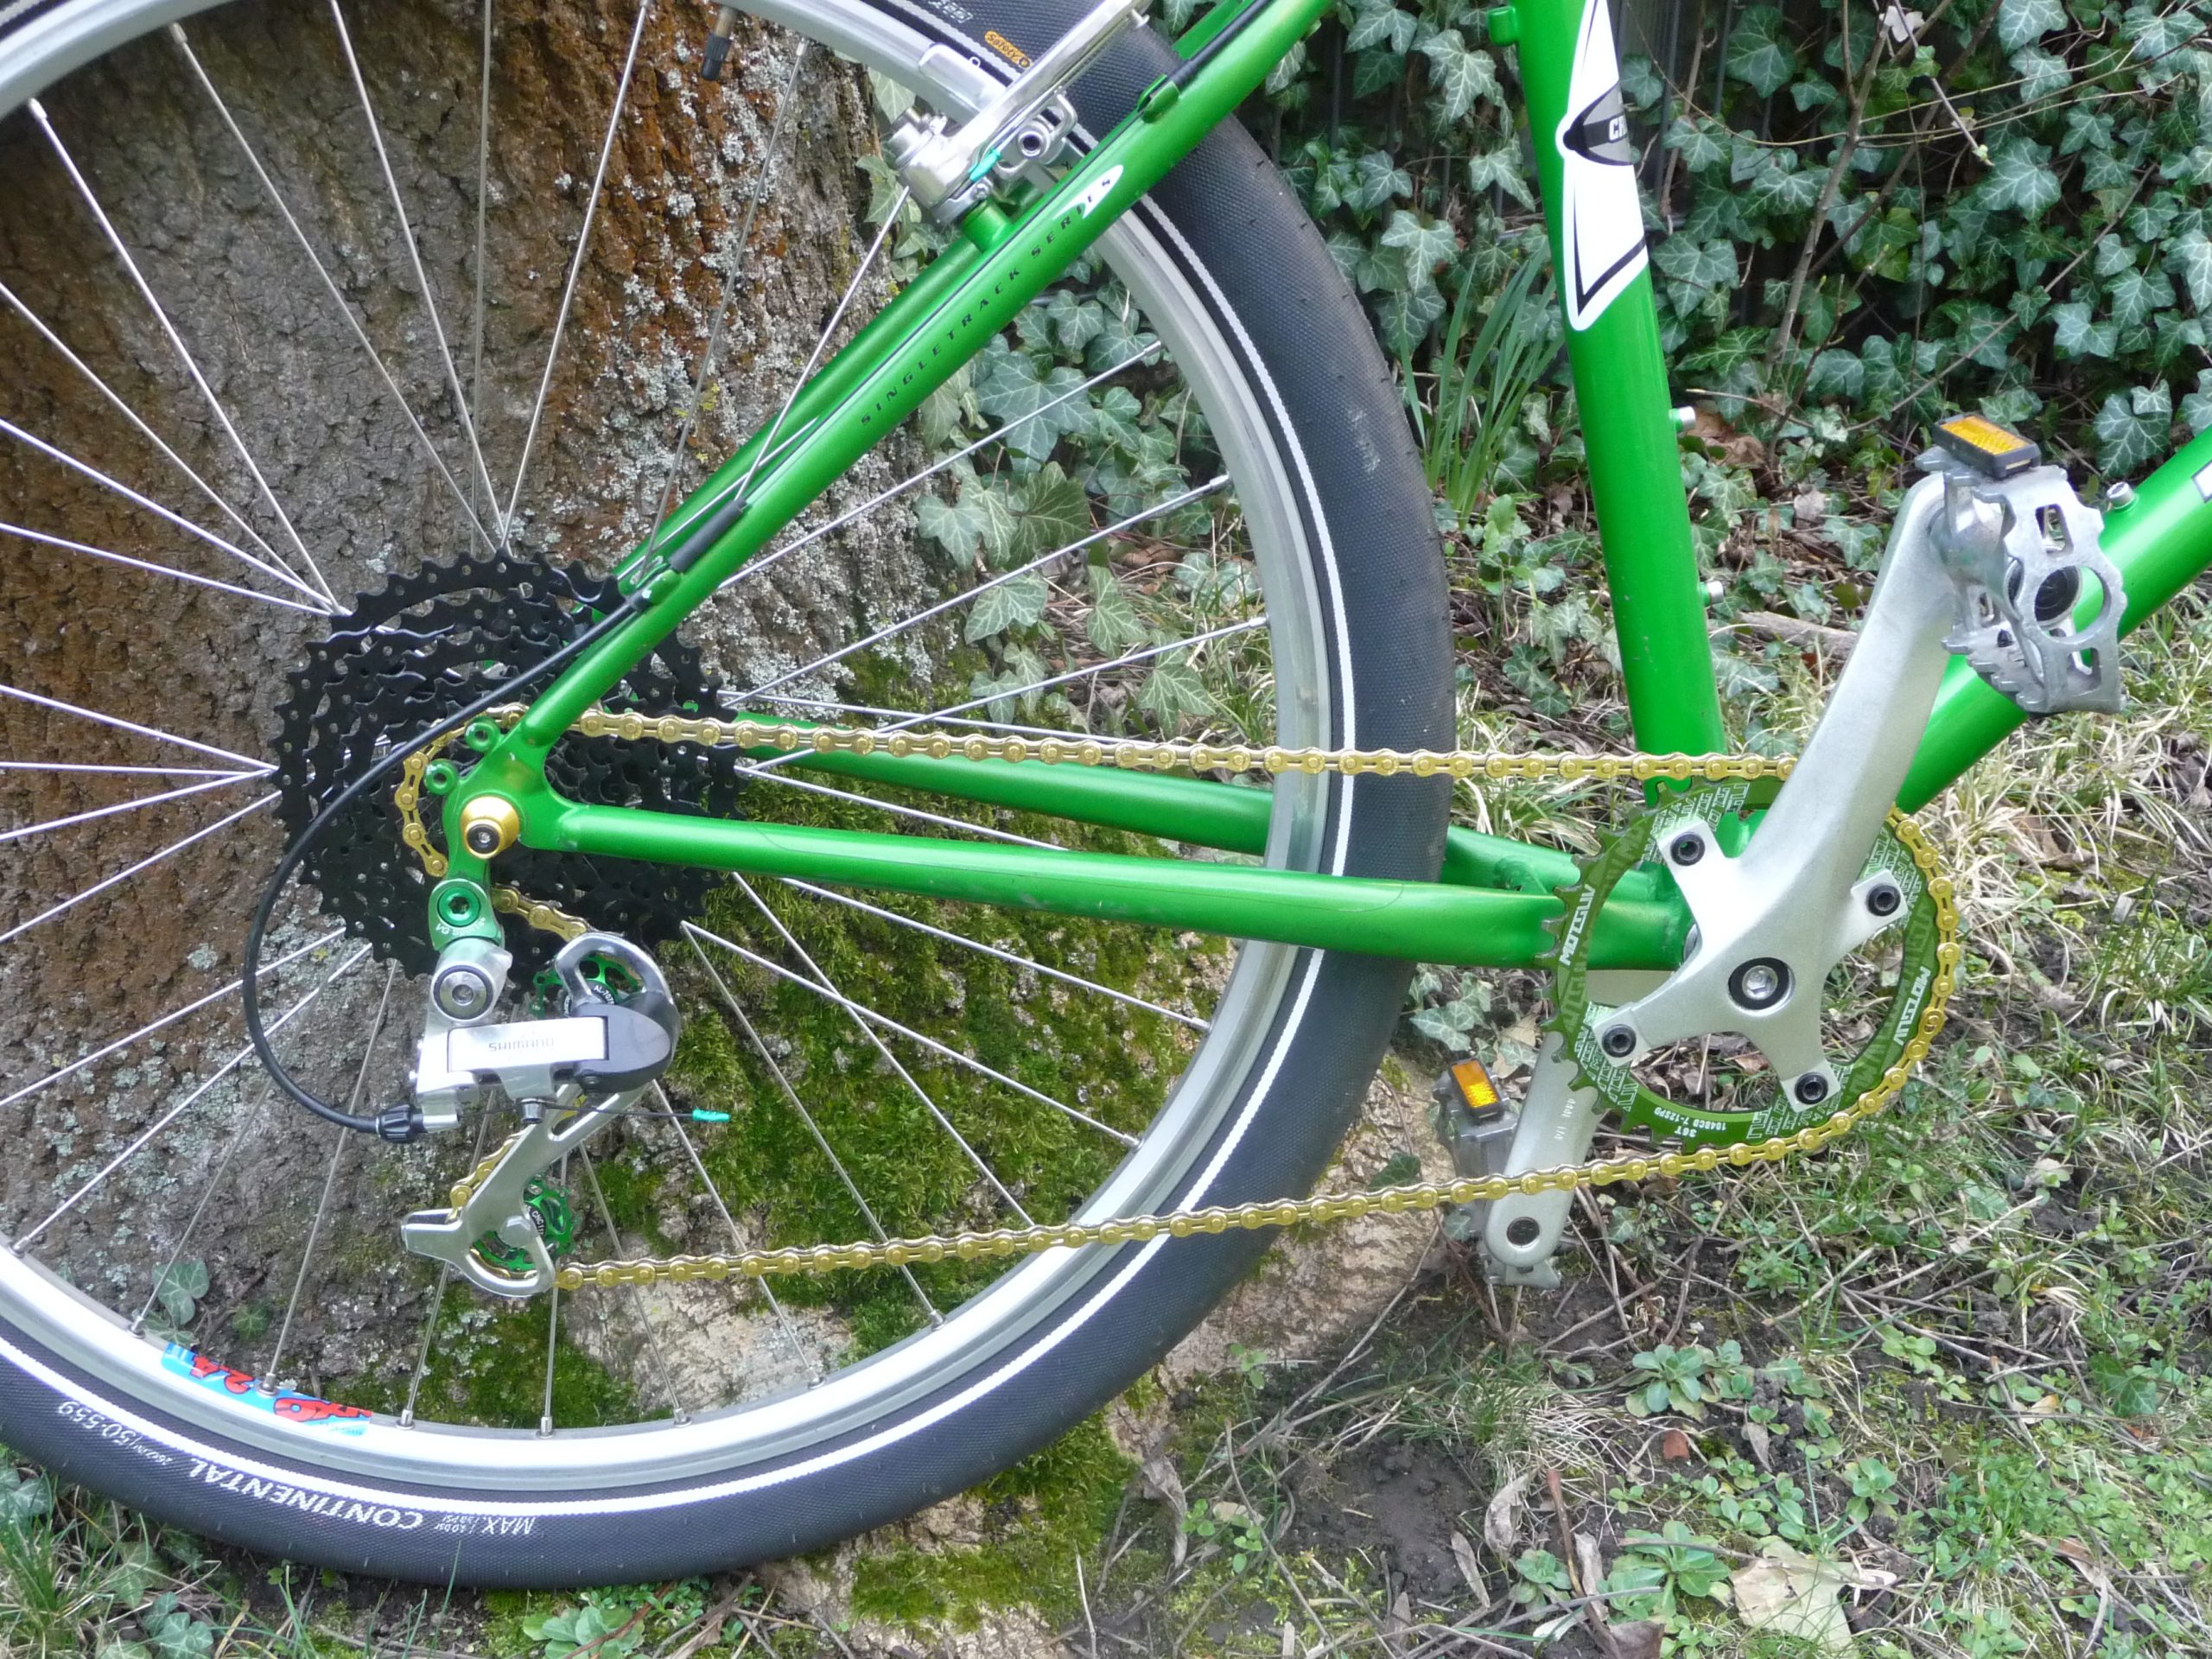
The cassette choice
For 8 speed, an organic spacing is 11-13-15-18-21-24-28-34. If the range is not sufficient, you will opt for 11-13-16-20-24-28-32-36 or Microshifts new Acolyte 11-13-15-18-21-24-30-38 For maximum bandwith, you might choose 11-13-15-18-22-28-34-40 (SunRace CSM680, also available with an 42 max cog) or 12-15-18-21-24-28-34-42 (Microshift Acolyte). On all cassettes I marked the 25% jumps bold. Typically on rather consistent terrain, you’ll want jumps around 15%, in the city with many traffic lights or in changing terrain, 20-25% are OK. Kids tend to pedal with a wider cadence range, so 25% isn’t considered bad for them – it also minimizes double shifts.
For 9 speed, the resulting organic spacing is 11-13-15-18-21-24-28-32-38, 11-13-15-18-21-24-28-34-40 or 11-13-15-18-21-24-28-34-42. 11-38 and 11-42 are available from Microshifts Advent series, Decathlon sells the 11-42 (full steel version) for 23€/pc. Given the durability of Advent, paying 4€ more compared to a chinese no name cassette usually pays in the long term. In any case: Beware of 9 speed cassettes with a 22-28 jump. Don’t go 11-46: This exceeds the capacity of old derailleurs that once were designed with 34 max cog in mind and will either result in bad chain wrap or bad shifting in the lower gears or both. There are a few budget 1×10 solutions that properly allow for 11-48 or even 11-51 I’ll discuss in a separate article.
Front chain ring and crank
If you are lucky, you are working on a bike that was sold after 1997 that already uses the widely adopted 4 bolt 104mm BCD (“bolt circle diameter”) crankset standard. If this is not the case, the most common older standards are 110mm 5 bolt and 94mm 5 bolt. Since 110mm was established as road bike standard later, narrow wide chain rings are available starting at 36 teeth. For 94mm only a few manufacturers like WolfTooth manufacture narrow wide chain rings, but there are plenty of options from TA, Stronglight, Surly in constant width. So in many cases it makes sense to buy a pair of 4/104mm cranks. Typically used ones are available starting at 10€, new ones around 18€. For riveted or welded chain rings very common on entry level bikes, you’ll need a crank anyway.
Four bolt BCD104 chain rings are typically 10 to 25€ each, depending on size and material. To determine whether a 32 or 42 teeth chain ring might fit best, just monitor your driving: If you are driving typically on the largest chain ring of a 3x setup, opt for 40 or 42 teeth, if you are typically utilizing the mid chain ring, go for 36 or 38.
The derailleur
You’ll typically work with a derailleur that was designed with a 32 teeth max cog in mind, later 8 speed derailleurs that were derived from 9 speed counterparts might work with 36 teeth with the b tension adjuster all in. Don’t do this, chain wrap on the higher gears will be terrible. Instead get a derailleur extender that move the whole derailleur down 2-3cm. With the b tension adjuster mostly in, chain wrap will be very good. A recommended modification on old Shimano derailleurs is to change the 10 teeth pulleys for 11 teeth pulleys with sealed bearings. They are available made from alloy (nice colours, cheap, but load) and Delrin™ (common name: polyoxymethylene, a bit more expensive, but quieter). This increases capacity by two teeth, providing a bit more chain tension.
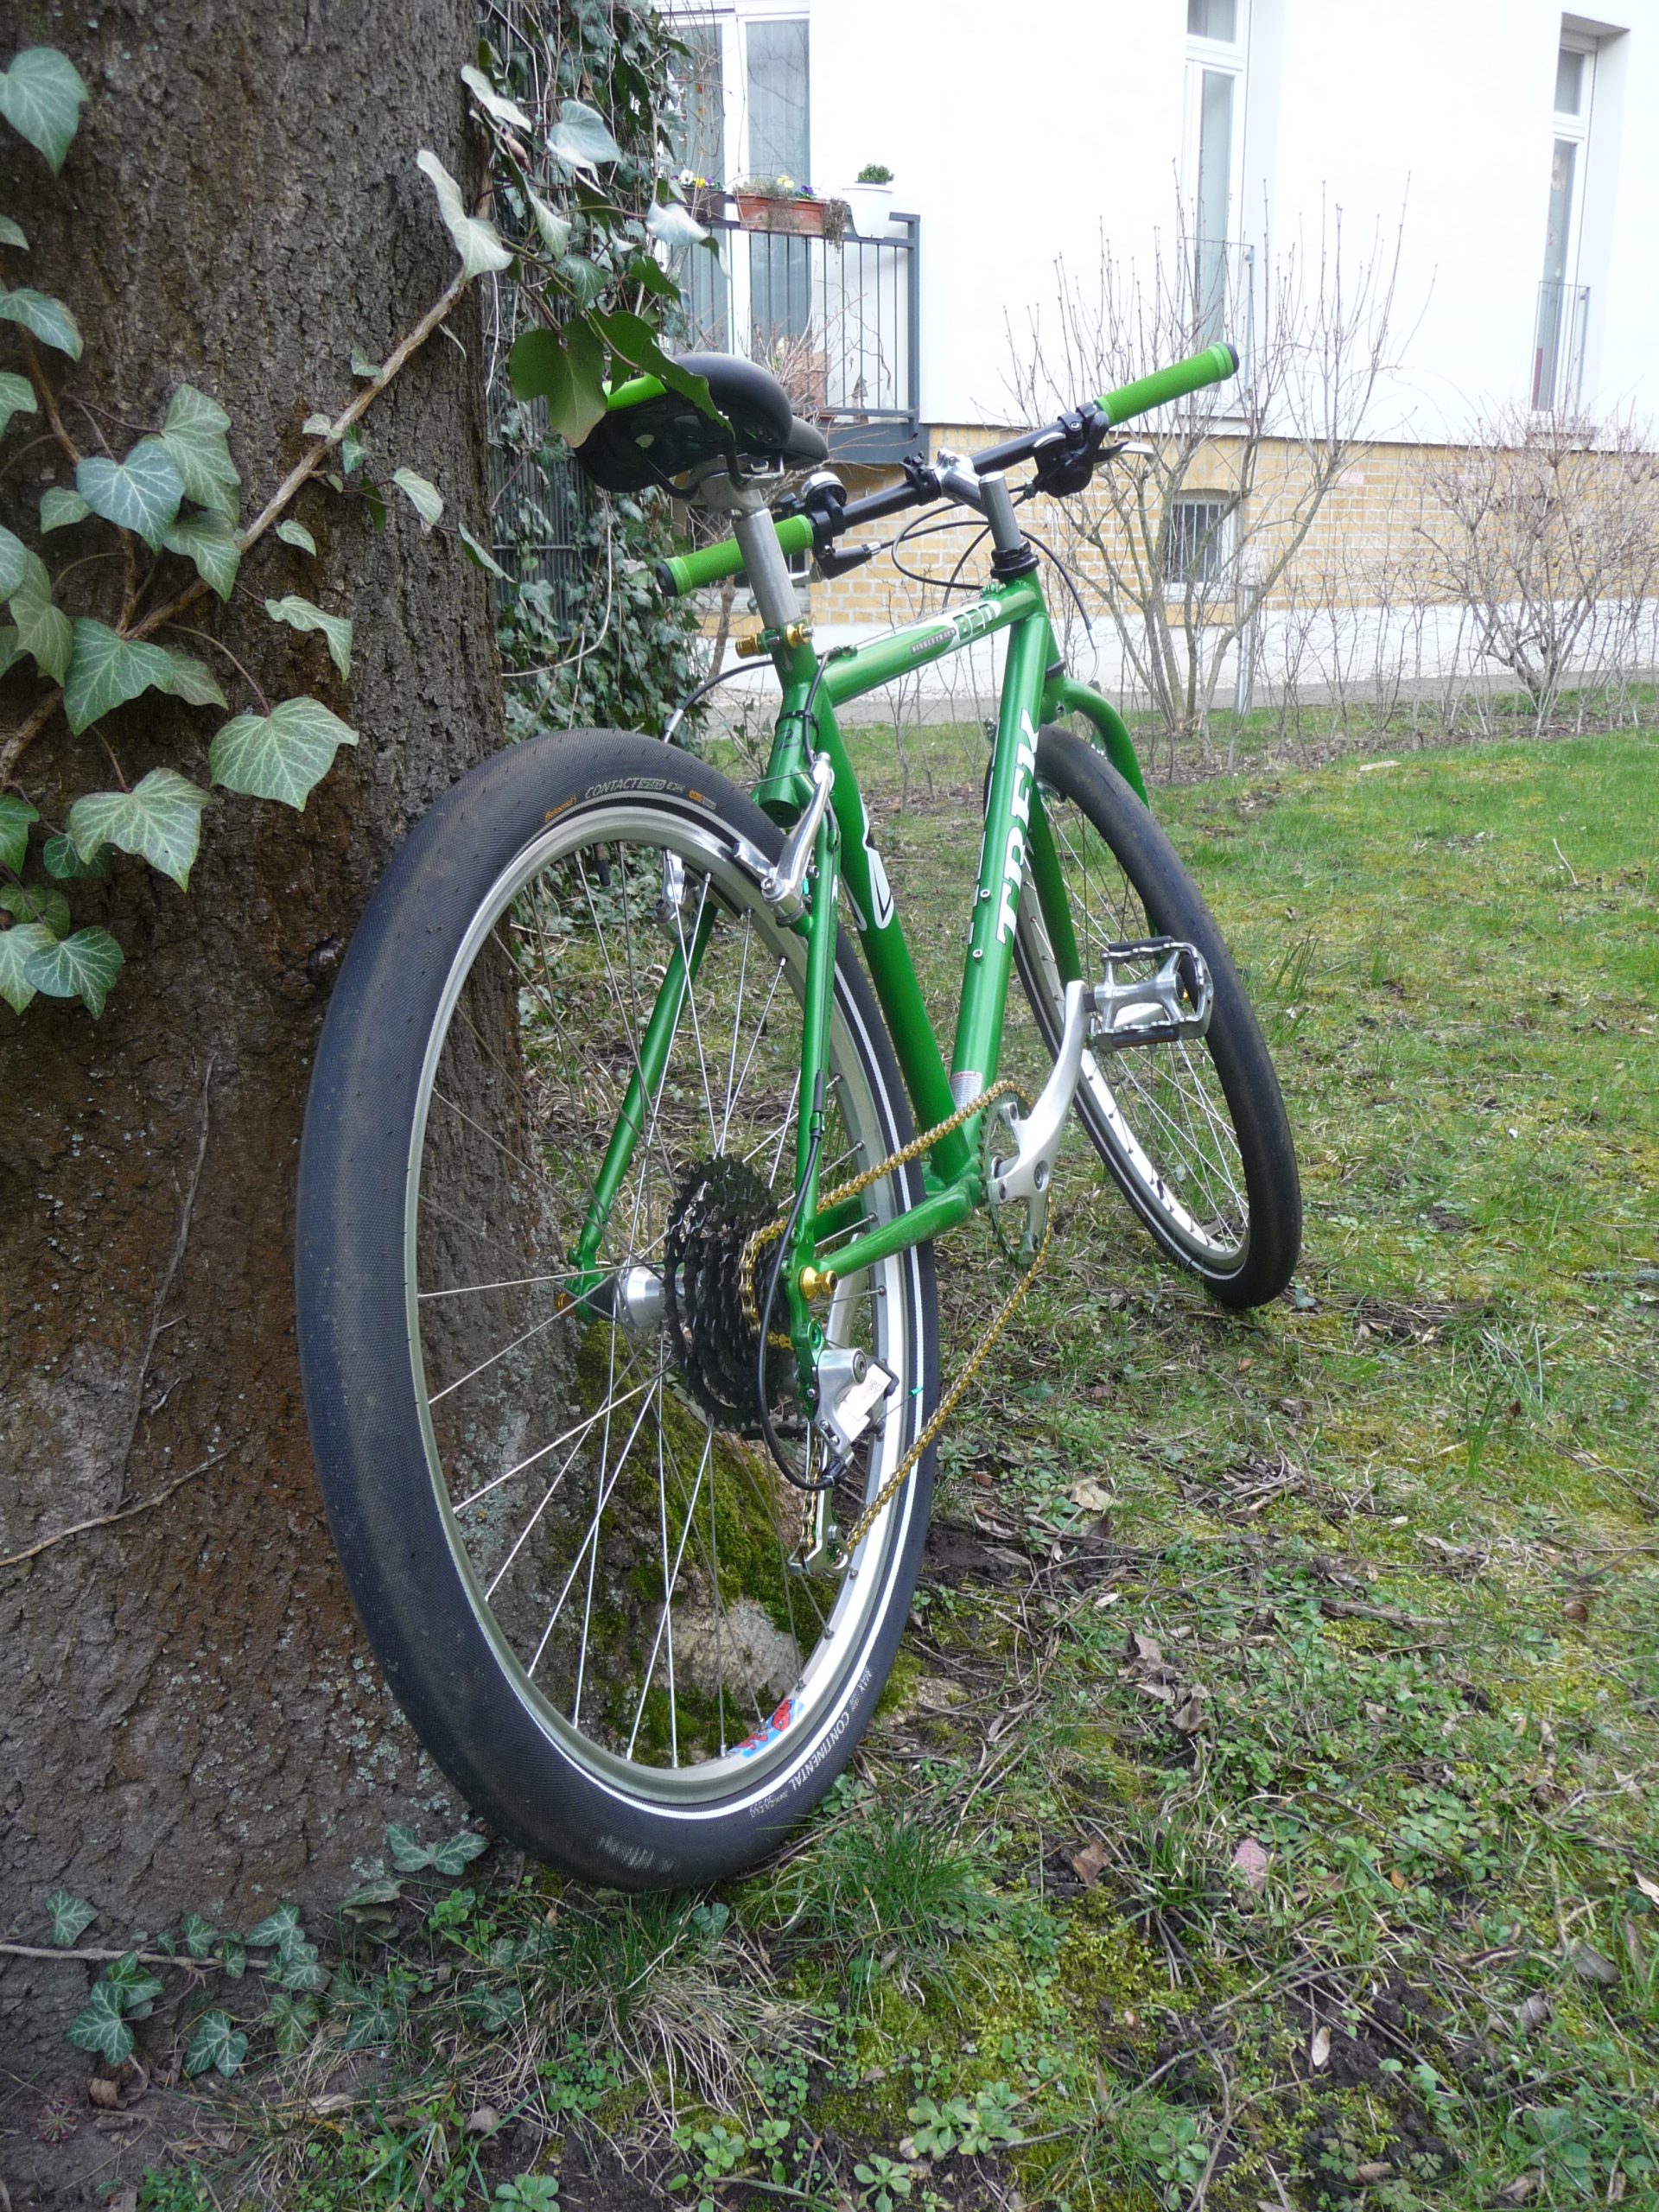
Chain – and done
To calculate the proper length of the chain, measure the chainstay length in cm, divide by 1.27 (cm/link), double this value, add half the size of the cassette, add half the size of the chain ring and then add three links for safety. For 43.7cm chainstays, a 42 cassette and a 38 chain ring this means:
(43.7 / 1.27) * 2 + 42/2 + 38/2 + 3
69 + 21 + 19 + 3 = 112
112 links needed!
So here you might start with 114 links and check whether tension and distance between pulley and largest cog is big enough and eventually shorten the chain if tension is too low.
tl;dr
For cheap 1x conversions:
- Any Shimano eight speed hub that is compatible with 11 teeth cogs works
- Nearly any Shimano Slant parallelogram derailleur for six to nine speed will do
- Do not exaggerate: 42 teeth should be maximum even with derailleur extender
- Stay eight or nine speed, ten speed needs rare parts and fiddling
Leave a Reply